|
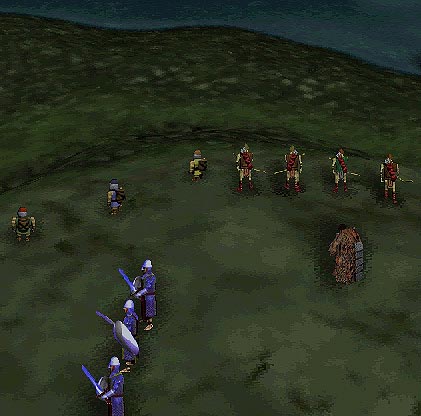
This is the 19th mission of Myth: The Fallen Lords. At this point in the story, the Legion is on its way to Rhi'anon and the final confrontation with Balor. Alric has devised a plan to use bone fragments from The Watchers arm to turn him into stone. Soulblighter needs to be delayed so that he cannot interfere. Thus a rear guard is left on an embankment near the Gjol River to hold his forces off. The goal of the mission is to hold out as long as possible against the hordes Soulblighter sends across the river. You are given an assortment of dwarves, arches and warriors, plus one Journeyman and a warrior captain. The hill you are on can only be accessed from the forces coming across the river via two valleys. It is easy to get distracted with events on one side and loose track of what is going on on the other side, so stay sharp. To start, place half your dwarves and half your arches on the hill near these entrances. This will allow the dwarves to rain satchel charges on the approaching Thrall, killing most of them before they make it up the hill. If a few of them do make it, engage them with your warriors. Don't let them kill any of your dwarves; the more you have later the better off you'll be. |
   |
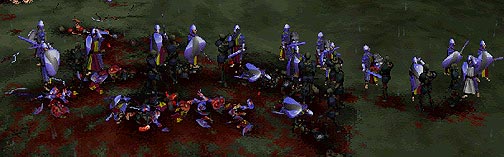
It's easy to get over confident at this point since the Thrall die so easily. But don't count on things staying the same. Some Wights will approach you from both sides, but for some reason approach in a single file line. Killing the first will cause a chain reaction which will eliminate the rest. The Fetch across the river are about to become a pain, but you can ignore them for the moment. A new contingent of Thrall will come at you, not from across the river, but from either the left or right of the map. (In this case it was the left, it's the red square at the bottom) This is a token force which is intended to distract you long enough for the Fetch to cross the river and weak havoc with your archers while you are paying attention to the Thrall. Keep an eye out for the two Fetch and start shooting as soon as you can. In this instance, the first one took me by surprise and I lost 3 archers, which is by no means crippling, but possibly didn't have to happen. Now you will see more forces coming across the river. To make matters worse, it begins to rain in earnest, making your cocktails unpredictable at best. I think that the left hand attack is the one which deserves the most attention since there are a number of Soulless with them who can snipe your dwarves and archers. Just proceed with the same strategy of throwing cocktails down on the Thrall and shooting the Soulless with your archers. |
 |
On the right hand field the computer puts the Wights in with the Thrall. Obviously, exploding the Wights will take care of most of your Thrall problem. I was lucky and a cocktail went off near the Wight, which made the blasts just a little bit stronger. Finish off what's left of the Thrall with the warriors. I was getting slaughtered on the other side of the map and needed to move my forces across the hill to take care of the remaining Soulless and Thrall. That was relatively easily done, but left my forces in very ragged shape. |
|
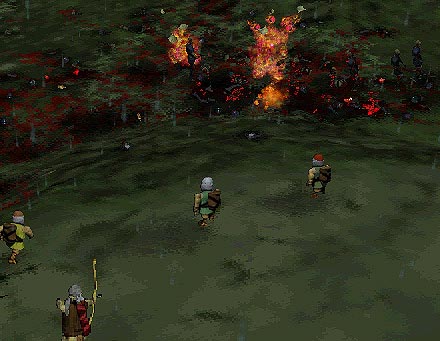
At this point, even more troops start pouring across the river. But don't despair, reinforcements soon arrive. Move them into position much like as before and slug it out. It's not likely that you will get the dwarves to the crest of the hill, but do what you can. Do as much damage with your dwarves before engaging in melee. Be careful not to let your dwarves throw cocktails into your own troops. After this exchange, it's over. |