Mission1: Crow's Bridge

by David Shaw - SatanTM on bungie.net


Crow's Bridge Map This is the first Mission of Myth: The Fallen Lords. It's pretty straightforward, but it's not easy enough to just run over and attack -- you'd get slaughtered. The story is that you are set to guard a village that isn't supposed to get any action (all the action is in Madrigal). All the sudden, an army of undead Thrall come pouring out of the water. You have to get the troops together to fight off this attack before it destroys the village. How are you going to do that? Well, read this and you'll know the answer.
Hill Setup 
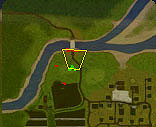
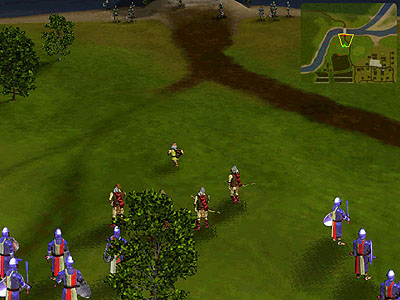
Now, the key to success in Myth is using the terrain and your army to your advantage. Since gravity matters, it's a lot better to be on high ground than on low ground. Plus, it's a lot safer for all your troops if the dwarves are only allowed to throw downhill. For this level, I move all the troops to the hill shown in the picture to the left. This is a good spot to defend from because the Thrall have to come up the hill to get to you (if they ever make it that far). Notice the positioning of the troops (click on the image for a larger view). The dwarf is ready to attack down the hill, as are the archers. The warriors are NOT set up to attack the thrall. Why? Their setup is important because of the ghols.

There's one other thing to do at the start. Take the two warriors on the bridge and run them back across the bridge (away from the city). They will go down that road and meet the second wave of enemies, delaying their arrival to the bridge (giving you a lot more time to fight the first wave). Think of them as a sacrifice for time. Trust me, it's worth it.


Harassing Ghols

Troop Setup


Look at the little map. The red dots represent bad guys, while the green ones represent your troops. The Yellow trapezoid is your current field of view. Notice that there are two groups of red off to the left and to the rear of your army (the red in front of you is the thrall army that you see at the bridge). These other two groups are ghols. The only problem with ghols is they move quickly and like to harass your units. They will sneak up on you, whack you with their cleavers, and run off before you can retaliate. This is especially bad when coupled with the fact that they will only attack your weaker units (like archers). If you always lose your archers, you will not succeed in Myth.

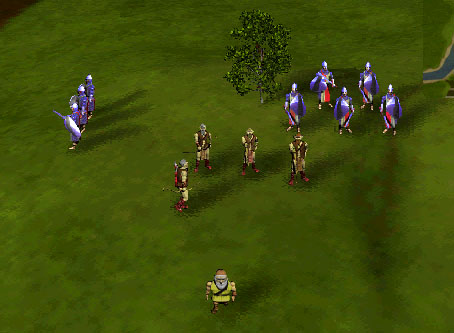
The warriors in the setup shown to the left are protecting the archers from ghol attacks. As long as the warriors stay there, the ghols will stay away (a warrior will kick a ghol's butt in a fight).


Turning the Enemy


This picture shows you how to fight thrall. Leave the archers and warriors up on the hill, and send the dwarf down to blow them up. The archers will attack from afar, while the dwarf wastes the oncoming horde. Two grenades will kill any thrall, and most die from one after being softened up with a few archers' arrows. You can see the dwarf has turned the enemy, who are now retreating back to the bridge. The dwarf chases after them, killing them all.

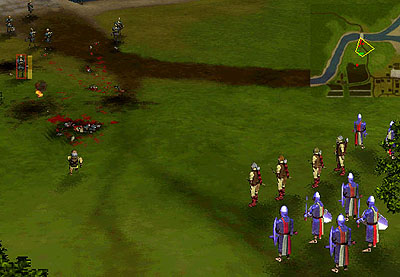
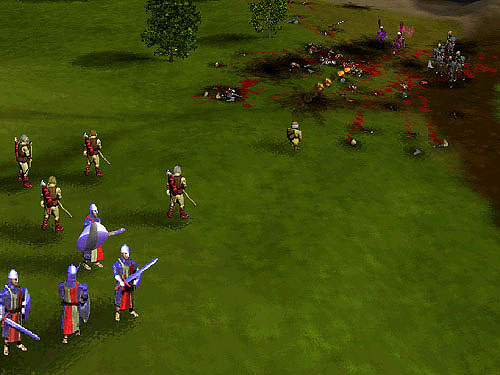
This is easy because Thrall can't do anything unless they catch the dwarf, and he is faster than they are. If the thrall do make it to your archers, retreat them, get the dwarf away where he can't hurt your friendly units, and kill off the thrall with warriors (but keep a few with the archers for protection against the ghols). This works fine until the second wave comes, which is more thrall and several soulless.


Second Wave


This shows what is left of the second wave after a little battling. The dwarf continues to fight the thrall, while the archers are targeted on the soulless. They soulless are the only real threat to the dwarf, and thus the most dangerous way to lose the mission. Kill them, and kill them quickly. They don't take much damage before they fall apart, so end their existance as soon as you can. The picture at the top of the page with the mission name is one of the last thrall falling from too many dwarven cocktails...


Once you kill all the thrall and soulless, the ghols will either (A) attack you or (B) run back across the bridge. Be prepared for either situation. Once the ghols are dead or retreated, you have completed the first mission! In this particular scenario, I only lost two units, and those were the two on the bridge that I sacrificed for more time. None of my other units sustained any real damage at all.


Stay tuned for more level walkthroughs as I have time to make them.
Hopefully by the time Myth hits the stores I will have all the levels ready to go online.